Chicken Mummy

Ingredients:
Day 1:
- Whole thawed chicken or hen
- 16 oz bottle Rubbing alcohol or any form of alcohol (used wine back in ancient times)
- 2 boxes of Baking Soda
- 2 containers of Baking powder
- lots of Salt 4-6 cups is good to start with depending on size of chicken.
- Freezer bag
- Bowl
- Gloves
- Paper or something to cover your work space
- Baby oil (unscented if possible or cooking oil)
- cloves, Cinnamon, all spice, nutmeg, rosemary
- mason jar with lid
- white/off white, linen, gauze or old fabric to cut into 1" strips. Enough to cover mummy 3 times.
- Elmer's school glue
- If you choose craft stuff to make adornments, sarcophagus and other items to decorate.

We are in Chapter 4 of our Story of the World Ancients curriculum. We learned this week about mummies. The kids had a good time with this one. We learned that mummies are the body of a person that is preserved after death. We learned that in Ancient Egypt they believed that you had to mummify a body after death in order to get to the afterlife. This fact alone was silly to my kids. They realize that we do not take our bodies when we die.

So in order to teach the kids about mummies we decided to make a chicken mummy. They learned the process in order to preserve it.

We started with cleaning the hen (could not get a chicken). I made sure to empty the cavity before we started this. Make sure to wear gloves in order to not spread salmonella germs.
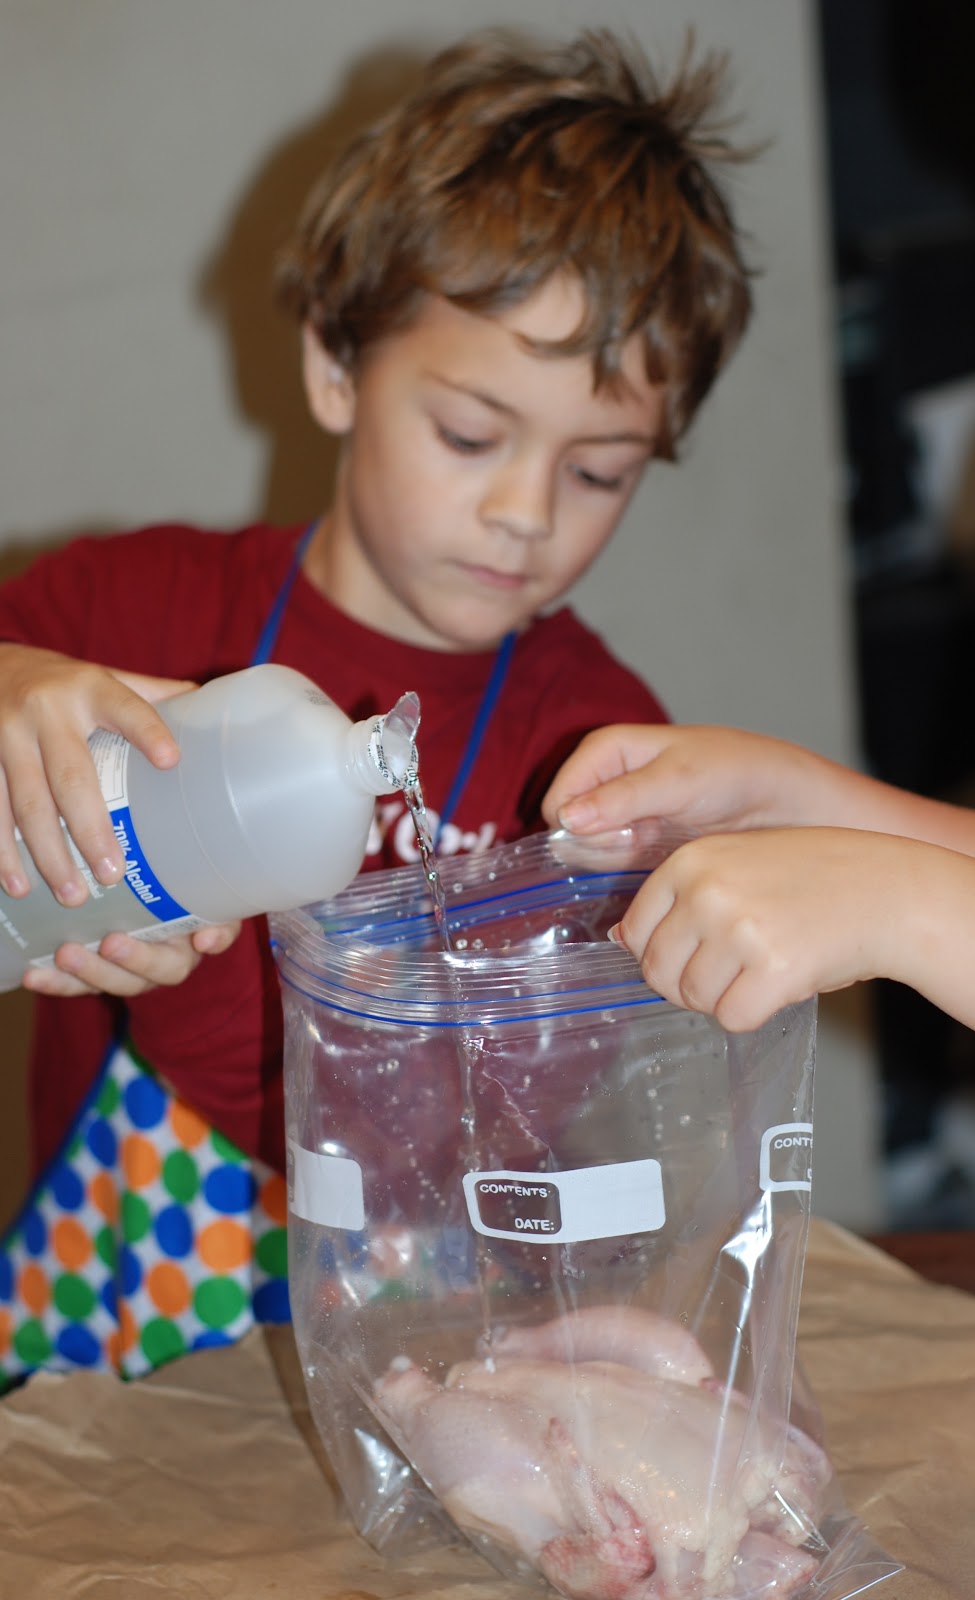
Once the hen was cleaned good with water we put it in a freezer bag and weighed it. Have your children write down observations at this step. What does the chicken feel like, smell like, color of skin and weight.

Make sure to put water in your bag first to check for holes. I skipped
this step and we ended up having to double bag in a pinch. Pour in a
full bottle of rubbing alcohol.

If you are going to let your children do this make sure an older one is
holding the bag steady. Instruct your children to slowly pour in order
to not spill. See even the toddler got into the project. She was ready to give the kids a bath.

Here is our double bagged hen and I had my oldest pour in the rest of the bottle with the two youngest holding the bag. At this point you want to push as much air out of the bag as possible and close it.

Be careful! Remember that pushing on a bag to fast or hard will push the liquid out. Apparently I was not thinking about that when I started. I got to rewrite my kids journal entry due to making this spill.

Now clean your bowl with hot water and soap to remove all germs. Put your bag in the bowl and let it sit for one hour. At the end of the hour turn the hen over and shake the bowl a few times to make sure everything is getting covered in alcohol. Let it sit for another hour. Repeat the process for a total of 4 hours.

While the chicken or hen is taking her bath have your kids mix together the dry ingredients. Make sure their hands are clean in order to not introduce bacteria. The baking soda and baking salt will increase the acidity
of the salt mixture reducing the amount of bacteria that can grow. This
mixture will also make the salt more similar to the natron salt used by
the ancient Egyptians which consisted of three salts plus sodium
sulfate. If you like, you can also mix spices anything sweet smelling will work like cinnamon, allspice, nutmeg or cloves.


In the new bag put enough of our salt mixture in to cover the bottom of the bag. You want to make sure that the chicken/hen is covered completely so make sure it is deep enough.

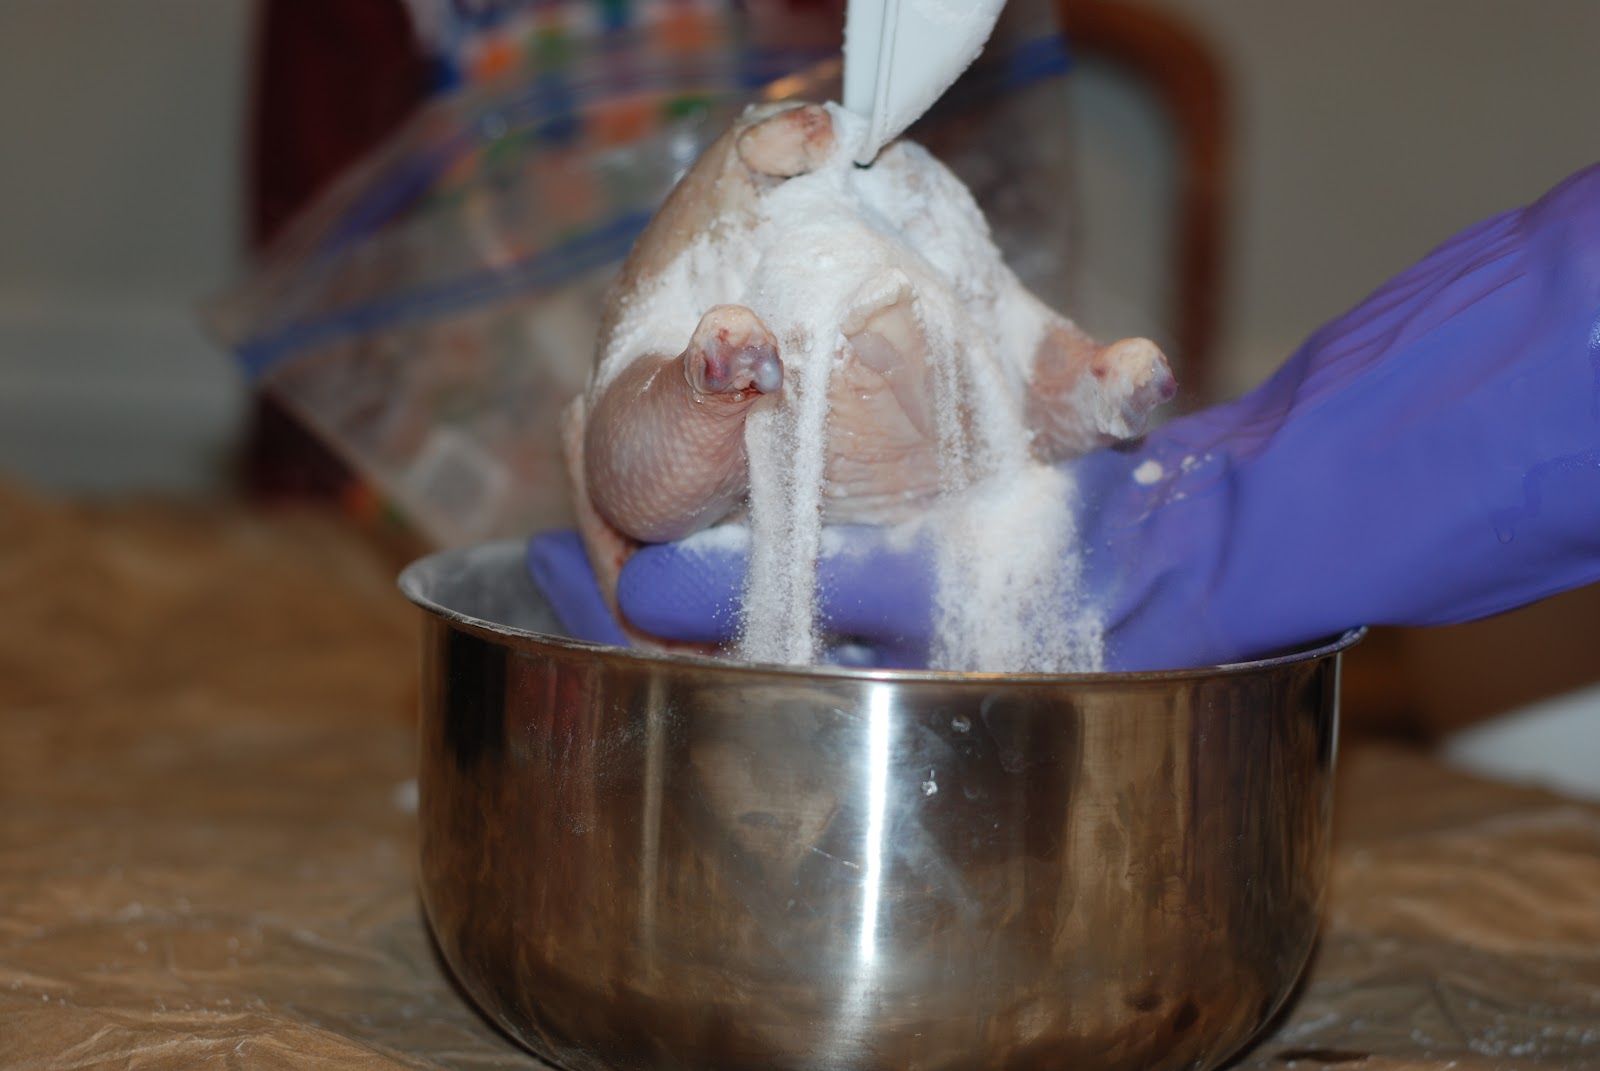
Turn the hen/chicken over and stuff the rump. Make sure to keep packing it down. You want to make sure all the bacteria is killed and to cover any smell.

One last smell and observation before putting our hen in the bag. Her big brother would not even get this close. He did not want to touch it or smell the chicken.


Day 5: We changed our salt mixture for the first time on Day 5. The hen did not smell bad but the salt mixture was lumpy and a little damp. I dumped all the salt mixture out and tried to get most of it off the inside and outside. The hen smelled like alcohol and not like yucky meat. The kids weighed the hen before we took it out of the bag and then after. It had lost about half a pound in weight. The kids made observations and wrote them all down in their journal. They put down the weight, what it looked at and smelled like. The hen is getting more dry.
At this point the pictures stop. I will add them when we get further in our process.
If you would like to make your own scented oil start this process 3 weeks prior to the time your mummy will be done. Take a mason jar and fill it almost to the top with a combination of cloves, rosemary, all spice, Cinnamon and nutmeg. Then fill the jar to the top with baby oil (unscented if you can find it). You will then set it in a sunny spot and shake it a couple times a day for 3 weeks. At the end of this time drain the oil and you now have a scented oil/spice to pat on your mummy.
If you would like to create adornments to be burred inside your mummy's cavity and to be put on the outside make them during this wait and see time frame. You can also make a sarcophagus using boxes in order to hold your Mummy. Once we get to this step I will include more detail in this post.
Once your mummy is dried out you will need to get your gloves and dust it off completely. Dry it off and pat it with your scented oil mixture or baby oil (cooking oil is fine too) inside and out.
Now it is time to wrap your mummy. Cut up 1" strips of old white (or off white) linen, shirts or gauze. Dip each piece into glue (sticky tree sap was used by the Egyptians). If you created adornments wrap them up in the cloth. Once this is done set it gently inside the cavity. Now it is time to wrap the mummy with the strips. Do this completely 3 times making sure to carefully go around the legs and wings of your mummy. In order to make the Mummy more authentic decorate outside with Egyptian markings, jewels, adornments, amulets and medallions (all can be handmade).
If you created a Sarcophagus place your mummy inside the tomb. You can bury your tomb or place it in a place of honor for the rest of the year. You also have a nice decoration every year for Halloween!
For more online learning here is a cool Mummy site for kids.
No comments:
Post a Comment